How I Make the Graphics for My Comic (Inter Lineas) — A Tutorial
IMPORTANT! READ THIS BEFORE YOU START! this tutorial assumes you already know the basics of Blender and Sims 4 Studio. I'm not going to walk through how to download Blender or the Sims 4 Ripper. There are already tutorials out there for that, and I'm not the best at explaining that part anyway. This is just my personal method, so if I forget a step here or there, sorry in advance!
Table of Contents
What You'll Need
- The Sims 4
- Sims 4 Ripper
- Blender 4.2.4 LTS
- A drawing program (I use Procreate)
- Sims 4 Studio
- A Tumblr account (or somewhere to find Sims poses)
Step 1: Make Your Sim
Start by creating your Sim in the actual game.
Step 2: Rip Your Sim with Sims 4 Ripper
Once Sims 4 Ripper is installed and hooked up to your game, export your Sim as a DAE file. Make a folder for these and actually name your files something useful, like "CharacterName_casual," instead of just "CharacterName1, CharacterName2," etc. The preview thumbnails aren't great, so if everything's named the same you'll have no idea what's what later.
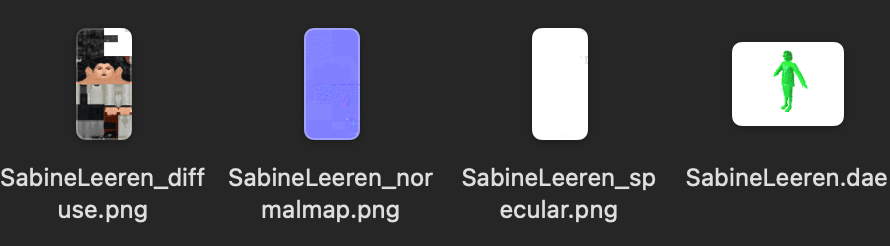
Each export gives you 4 files:
- A diffuse map (PNG)
- A normal map (PNG)
- A specular map (PNG)
- The DAE file itself
Step 3: Import into Blender
Open Blender, go to File > Import > Collada (.dae) (Legacy). Your Sim will load in, standing in an A-pose.
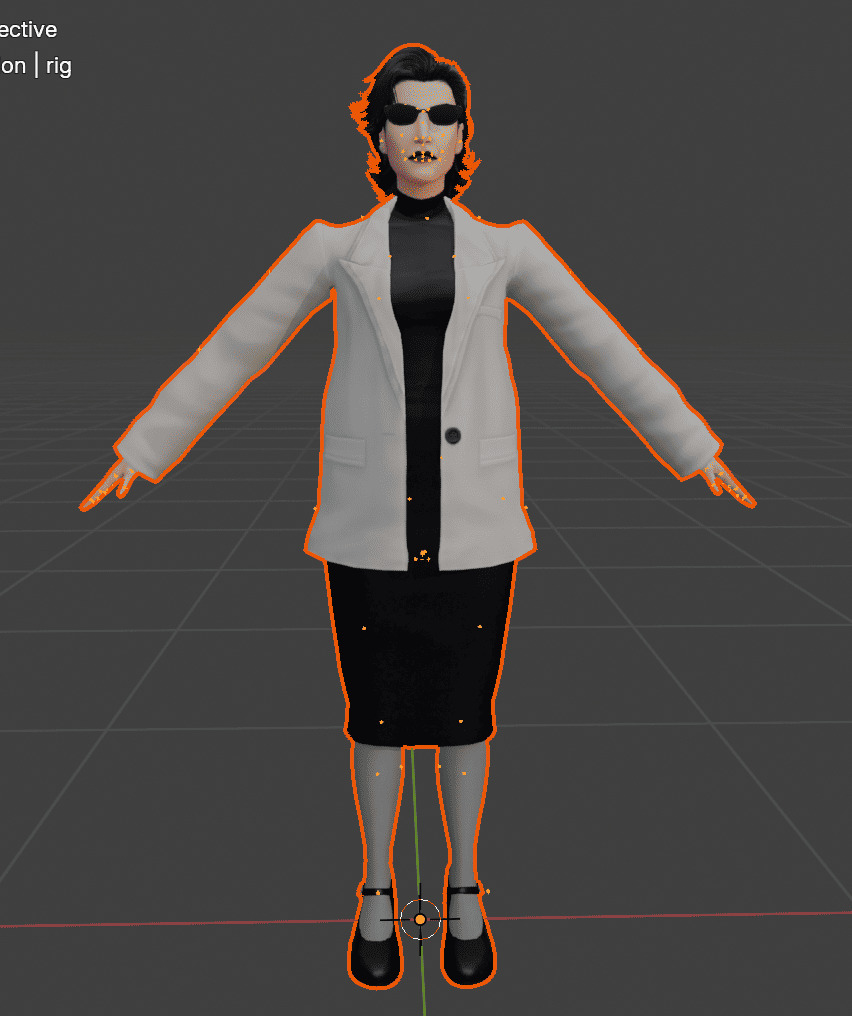
Step 4: Set Up Your Rig for Posing
Double-click the little orange dots on your model's rig. Scroll down and choose "Insert Keyframe with Keying Set," then select Location, Rotation, Scale & Custom Properties.
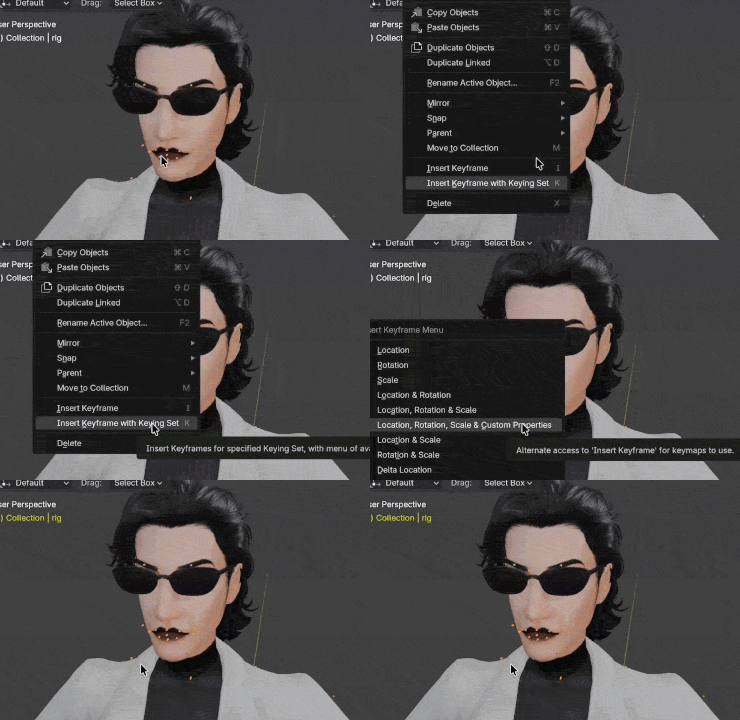
Step 5: Add a Pose
- Open a second screen/workspace in Blender and pull up the Non-Linear Animation section
- It'll say "Rig Action" — delete that so you can add your own pose
- Open the pose package in Sims 4 Studio, go to Clips, pick your pose, and export it as a .blend file
- Back in Blender: File > Append > [your pose.blend] > Action > select the pose
Step 6: Apply the Pose to Your Rig
- Split your workspace into two windows
- One window: Non-Linear Animation
- Other window: Pose Mode — select all the little dots on your Sim's rig
- Right-click > Insert Keyframe > LocRotScale
- An orange bar will show up in Non-Linear Animation — expand it
- Go to Add > Add Action Strip > choose your appended pose
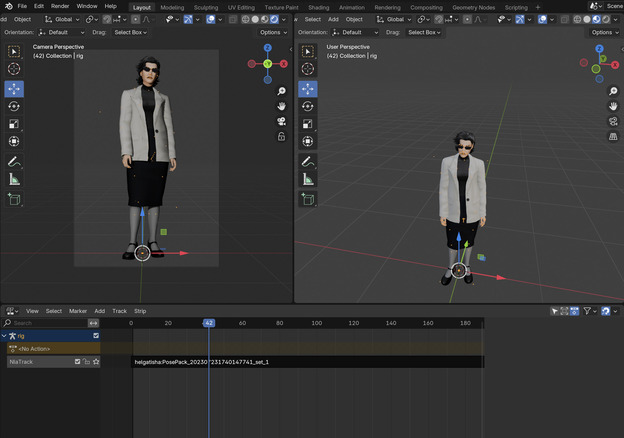 My layout. Judge all you want.
Step 7: Build Your Scene
From here, just use Blender like normal. Adjust the scene, change lighting, move the camera around, and use that as your reference for drawing. I know the obvious question is "why not just draw it from imagination?" In my experience, I think this is an inexpensive and rather helpful tool for practicing poses and tricky camera angles you might not be confident drawing freehand. Building it in 3D space first can help you visualize your ideas, and it's a great way to learn the software too!
Step 8: Drawing Over It
My process is that I capture the image, vectorize/dither it to flatten the colors down to basic shapes, then use the blend tool in Procreate to paint and draw over it. I used to just trace straight in Procreate, but eventually I switched to
literally painting over the model using my own colors as a base.
A friend once said my drawings look like little painted sculptures or figurines, like a D&D mini. If there's ever weird clipping in your scene (it happens to everyone), just draw over/around it once you're in your drawing program.
Bonus: Custom Content
Sims 4 Ripper supports custom content, so feel free to go wild with mods for extra variety.
Where to Find Poses
Good pose packs make a huge difference. A few blogs I recommend:
It's also worth just browsing Tumblr in general. There are a ton of pose blogs out there.
Organization Tip
Keep your pose folder organized. I personally prefer "all-in-one" pose packs over individual ones since they're way easier to manage. But, if you're picky about specific poses, downloading them individually works too!
That's it! That's basically my whole workflow for building the scenes and references for my comic.